Aucun résumé des modifications |
(in:) Balise : Éditeur visuel |
||
| (9 versions intermédiaires par 2 utilisateurs non affichées) | |||
| Ligne 1 : | Ligne 1 : | ||
| − | <gallery type="slideshow" position="center" widths="690px"> |
+ | <gallery type="slideshow" position="center" widths="690px" hideaddbutton="true"> |
Dokkaneventbardockssj3.png |
Dokkaneventbardockssj3.png |
||
Dokkaneventbardockssj31.png |
Dokkaneventbardockssj31.png |
||
| Ligne 7 : | Ligne 7 : | ||
{| style= "padding: 1px;background: #F7F7F7;border: 2px solid #2C75FF;border-radius: 7px;-moz-border-radius: 7px;-webkit-border-radius: 7px; box-shadow:0 0 4px #414141;" border=2 width="100%" align="center" |
{| style= "padding: 1px;background: #F7F7F7;border: 2px solid #2C75FF;border-radius: 7px;-moz-border-radius: 7px;-webkit-border-radius: 7px; box-shadow:0 0 4px #414141;" border=2 width="100%" align="center" |
||
| + | ! |
||
| − | + | [[File:charabardockssj31.png|340px|link=Preuve de force du Saiyan - Bardock Super Saiyan 3]] |
|
| + | [[File:charabardockssj32.png|340px|link=Le Saiyan contre-attaque - Bardock Super Saiyan 3]] |
||
|} |
|} |
||
<br /> |
<br /> |
||
| Ligne 20 : | Ligne 22 : | ||
![[File:DS.png|35px]] |
![[File:DS.png|35px]] |
||
|- |
|- |
||
| − | ! colspan="9" style="background:#dfdbdb" |Niveau 1: |
+ | ! colspan="9" style="background:#dfdbdb" |Niveau 1: Combat inconnu |
|- |
|- |
||
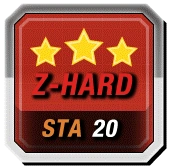
| rowspan=3 | [[File:Zhard20.png|60px]] |
| rowspan=3 | [[File:Zhard20.png|60px]] |
||
| Ligne 50 : | Ligne 52 : | ||
|[[Fichier:Superpui.png|40px]] |
|[[Fichier:Superpui.png|40px]] |
||
|- |
|- |
||
| − | |[[Fichier:4th.png]] [[Fichier:Bardockssj3turint.png|70px|link=Preuve |
+ | |[[Fichier:4th.png]] [[Fichier:Bardockssj3turint.png|70px|link=Preuve de force du Saiyan - Bardock Super Saiyan 3]] |
|[[Fichier:Superint.png|40px]] |
|[[Fichier:Superint.png|40px]] |
||
|- |
|- |
||
| − | |[[Fichier:5th.png]] [[Fichier:Baddackssj3ssragi.png|70px|link= |
+ | |[[Fichier:5th.png]] [[Fichier:Baddackssj3ssragi.png|70px|link=Le Saiyan contre-attaque - Bardock Super Saiyan 3]] |
|[[Fichier:Superagi.png|40px]] |
|[[Fichier:Superagi.png|40px]] |
||
|} |
|} |
||
<br /> |
<br /> |
||
| − | {| style= "padding: 1px;background: #F7F7F7;border: 2px solid # |
+ | {| style= "padding: 1px;background: #F7F7F7;border: 2px solid #2C75FF;border-radius: 7px;-moz-border-radius: 7px;-webkit-border-radius: 7px; box-shadow:0 0 4px #414141;" border=2 width="100%" align="center" |
! style="background:#dfdbdb" |Information(s) complémentaire(s) |
! style="background:#dfdbdb" |Information(s) complémentaire(s) |
||
|- |
|- |
||
| |
| |
||
* Bardock Super Saiyan annule les réductions d'attaque et de défense. |
* Bardock Super Saiyan annule les réductions d'attaque et de défense. |
||
| − | * Vous avez 9 tours pour tuer [[Fichier:Baddackssj3ssragi.png| |
+ | * Vous avez 9 tours pour tuer [[Fichier:Baddackssj3ssragi.png|40px]] sinon vous perdez directement. |
| + | ** Vous ne pouvez pas utilisez de DS pour continué. |
||
| ⚫ | |||
| + | ** Il ne lance pas d'attaque, c'est un simple Game Over inesquivable. |
||
| ⚫ | |||
|} |
|} |
||
[[Catégorie:Événement Dokkan]] |
[[Catégorie:Événement Dokkan]] |
||
| + | [[Catégorie:Événement INT]] |
||
| + | [[Catégorie:Événement Jeux]] |
||
Version du 2 février 2019 à 21:08


|
|
|---|


| Difficulté | Boss | Type | Xp de rang | Drop | Quantité | |||
|---|---|---|---|---|---|---|---|---|
| Niveau 1: Combat inconnu | ||||||||
|

|
15000 | 
|
3-6 | 1 | |||

|
||||||||

|
||||||||
|
|
20000 |
|
7 | 1 | |||
|
|
||||||||
|
|
||||||||

|
||||||||

|
||||||||
| Information(s) complémentaire(s) |
|---|
|